Getting started — Goeboek AI Prompts
The pack builds Goeboek one prompt at a time. Each prompt describes one part of the site exactly — sizes, spacing, text styles, motion, content — and names the screenshots that show how it should look. This guide takes you from the download to a finished site.
What you need
Section titled “What you need”- An AI tool that writes and runs a website: a chat builder (Lovable, Bolt, v0, Replit) or a coding agent (Cursor, Claude Code, Codex, Windsurf). Notes for each are in Notes for each tool.
- A plan with room for about 35 to 45 messages: the 23 prompts, plus a few follow-ups to fix details. Free plans usually run out before the end.
- A web browser to open
Prompts.html.
What is in the pack
Section titled “What is in the pack”| Folder or file | What it is for |
|---|---|
Prompts.html |
Open this first: every prompt with a Copy button, the screenshots to attach, and your progress |
prompts/ |
The same prompts as Markdown files (01-foundation.md … 23-finish.md) |
references/ |
Screenshots of every page layout: home-desktop-1.png (laptop, 1200 px wide, top to bottom), home-tablet-1.png (810 px), home-wide-1.png (desktop, 1440 px) and home-phone-1.png (390 px wide, three strips side by side, each continuing the one before) |
content/ |
The demo text as JSON: site.json, sections.json (copy shared by several pages: the call to action, the listing filter, the property card’s labels), pages/*.json (one per page; properties.json serves the five listing pages, success.json the two thank-you pages), collections/*.json (properties, agents, locations, categories, posts, testimonials) |
assets/ |
images/ (placeholders at the right sizes, and the logo mark logo-mark.svg and the thank-you drawings success-tour.svg and success-property.svg, which are real drawings), icons/ (22 Phosphor icons), and icon.png and apple-icon.png, the browser tab icons (the round mark, real files) |
checklist.md |
Section heights per page, for agents that can measure what they built |
DESIGN.md |
The design tokens and rules in one file, for building new pages in the same style later |
The order of the prompts
Section titled “The order of the prompts”| # | Prompt | What it builds |
|---|---|---|
| 1 | Foundation | The project, the design tokens (colours, the two fonts, text styles, spacing, motion), the rules for breakpoints, images and the forms, the page list, and the logo mark |
| 2 | Components | Sections and dividers, label chips, section titles, the logo, nav links and the menu button, the pill, flip, Load More and submit buttons, the stats and ratings, the property, post, testimonial and agent cards, the slideshow, rich text, the listing filter, the Load More list, form fields and radio groups, and the icon files — everything the pages are made of |
| 3 | Layout | Header (with the phone menu) and footer, the site details (site.json: logo, menu, header buttons, contact details, footer, social links) and the shared section copy (sections.json) |
| 4–7 | Content | The collections: the 21 properties in two parts (the second with the agents, locations and categories), then the 12 posts in two parts (the second with the testimonials) |
| 8–22 | Pages | One prompt per page layout: Home, Properties, Type (Sell / Rent), Location, Property category, Agent, Property, Blog, Post, About, Contact, Add property, Success scheduled, Success add property, 404 |
| 23 | Finish | Browser titles and descriptions, share tags, tab icons, sitemap and robots, a last check of every page |
Each prompt builds on the ones before it, so keep the order. The Properties prompt (9) builds the listing — the page title, the filter and the cards — that Type, Location, Property category and Agent (10–13) reuse with their own properties. The Property prompt (14) brings the labels the property cards use for their figures; until then the cards show the figures without them.
Breakpoints
Section titled “Breakpoints”Goeboek has four layouts: phone below 810 px, tablet 810–1199, laptop 1200–1439 and desktop from 1440. The main screenshots are the laptop layout at 1200 px and the phone at 390; the tablet (810) and desktop (1440) ones are optional, for tools that take more images.
With a chat builder
Section titled “With a chat builder”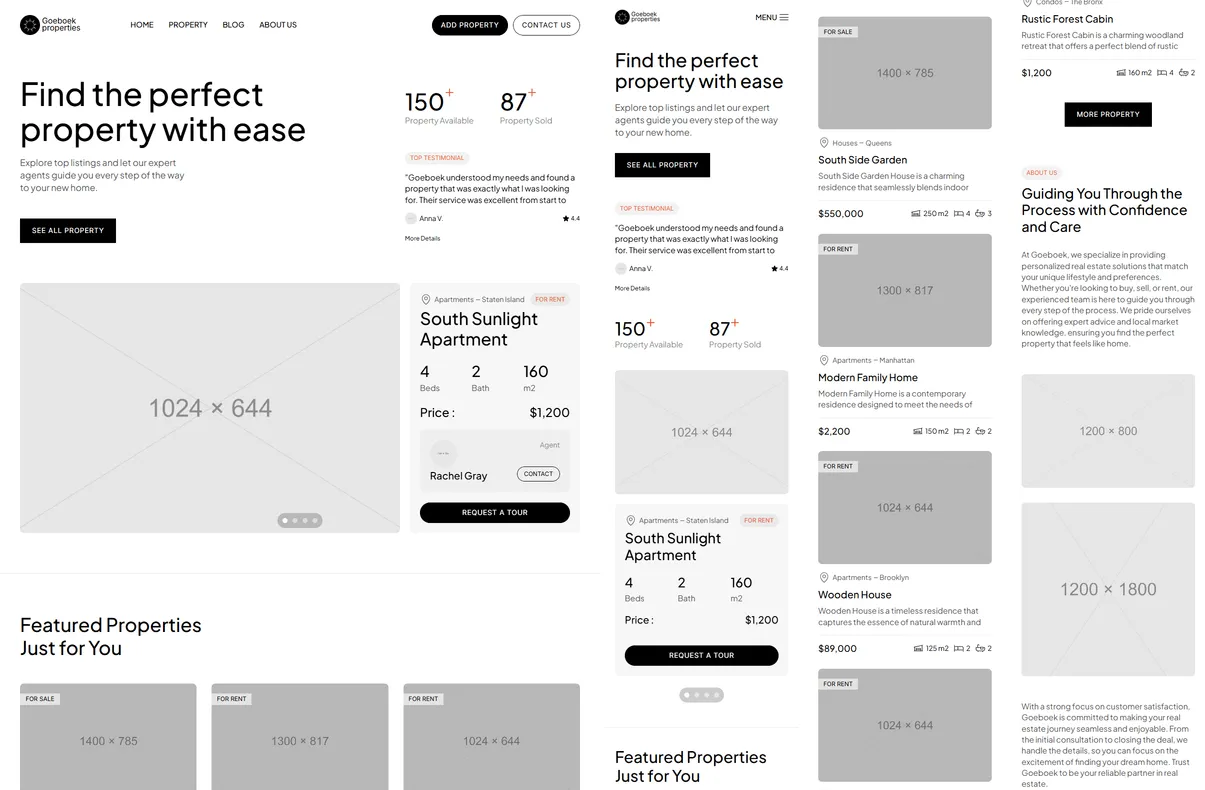
- Open
Prompts.htmland choose Lovable, Bolt, v0, Replit at the top. - Start a new, empty project in your tool.
- Copy prompt 1. In the tool’s message box, attach the screenshots listed on the card (drag them from the
referencesfolder, or use the attach button), paste the prompt and send it. - Wait until the tool has finished and the preview works. Compare it with the screenshots; if something is off, ask for that one fix in a short message (“On laptops, the two header buttons should sit at the right, 10 px apart, as in the screenshot”).
- Tick the prompt in
Prompts.htmland go on with the next one.
Before the page prompts, add the pack’s images to the project: upload the assets/images folder into
public/images/, the assets/icons folder into public/icons/, and assets/icon.png and assets/apple-icon.png
into public/. The prompts expect them there, and the pages only take the right shapes once they are. The images
folder also holds the logo mark and the two thank-you drawings, which are real drawings.
The Content prompts (4–7) are long on purpose: they carry the demo text of every property, agent and post. Send them as they are. The tool saves the files and shows nothing new yet — that is expected.
Some page prompts list many screenshots (Home has four laptop slices and two phone images, plus four tablet and four desktop ones if your tool takes them). Attach the laptop ones first; if your tool has a limit, send the rest in a short follow-up (“Here are the phone screenshots for the same page”).
With a coding agent
Section titled “With a coding agent”- Copy the whole pack into your project folder and name it
goeboek/. - Open
Prompts.html, choose Cursor, Claude Code, Codex, Windsurf at the top, and copy the kickoff prompt. - Send it to the agent. It copies the content, the images and the icons into the project, then works through the
prompts in order, opening the screenshots for each page. The Content prompts are skipped — the files are already
there. The foundation prompt has it copy
goeboek/assets/icon.pngtopublic/icon.png, and the finishing prompt addsapple-icon.png. - Check each page as it lands, in the browser, at phone and laptop width. Agents that can run a browser can also
compare their result with
goeboek/checklist.md.
Checking a page
Section titled “Checking a page”- Put the site next to the page’s screenshots at 1200, 810 and 390 px wide (and 1440 if you attached them): same
sections, in the same order, with the same alignment and spacing. The screenshots were taken in windows of
1200 × 900, 810 × 1000, 390 × 844 and 1440 × 900. The pages with an address per item show Marble House
(
/property/marble-house), Houses (/property-category/houses) and the first item of the other collections; a slideshow may show a later slide. - Resize the window slowly from phone to desktop: the layout changes at 810, 1200 and 1440 px and never scrolls sideways.
- On a computer, hover the header’s links and buttons, the property cards (the agent appears and the photos start to step), the post cards and the chips of the filter. On Home, watch the hero’s properties and testimonials step on their own and try the dots and arrows. On Properties, click “Load More”; at phone width, open the filter with “More” and open and close the menu. On a property page, send the tour form in demo mode; send the contact form and the Add property form too.
Photos are grey placeholders until you add your own — see Making it yours.